If you love the creamy, dreamy flavors of banana pudding and cheesecake, you’ll flip for these Banana Pudding Cheesecake Cones — a fun, no-bake, portable dessert that’s perfect for parties, family nights, or any time you want something sweet with little fuss. Think banana‑pudding flavor + cheesecake cream + crunchy cone — all in one bite.

✅ Why You’ll Love These Cones
-
No‑bake dessert — no need to fire up the oven if you don’t want to. Recipes by Clare+2Creatives Cookery+2
-
Handheld & fun — crunchy waffle cone + creamy filling makes these ideal for parties, picnics, or serving to kids. My Homemade Recipe+2Recipes by Clare+2
-
Best of both worlds — the flavor of banana pudding meets cheesecake richness and vanilla‑wafer crunch. Daily Easy Meals+2Immaculate Bites+2
-
Quick to assemble — once the filling is ready, it takes just a few minutes to fill the cones. Recipes by Clare+2Creatives Cookery+2
Ingredients (makes about 10–12 cones)
Cheesecake‑Banana Filling
-
8 oz (≈ 225 g) full‑fat cream cheese, softened Recipes by Clare+1
-
½ cup powdered sugar My Homemade Recipe+1
-
1 tsp pure vanilla extract Recipes by Clare+1
-
1 cup heavy whipping cream, cold and whipped to soft peaks Recipes by Clare+1
-
1 box (3.4 oz) instant banana‑pudding mix + cold milk (amount per package) to make pudding — or pre‑made banana pudding Recipes by Clare+1
Add‑ins & Garnish
-
1–2 ripe bananas, sliced (for inside + topping) My Homemade Recipe+1
-
Vanilla wafers, crushed (optional — for extra crunch / cookie‑crumb “crumb layer”) My Homemade Recipe+1
Cones & Topping
-
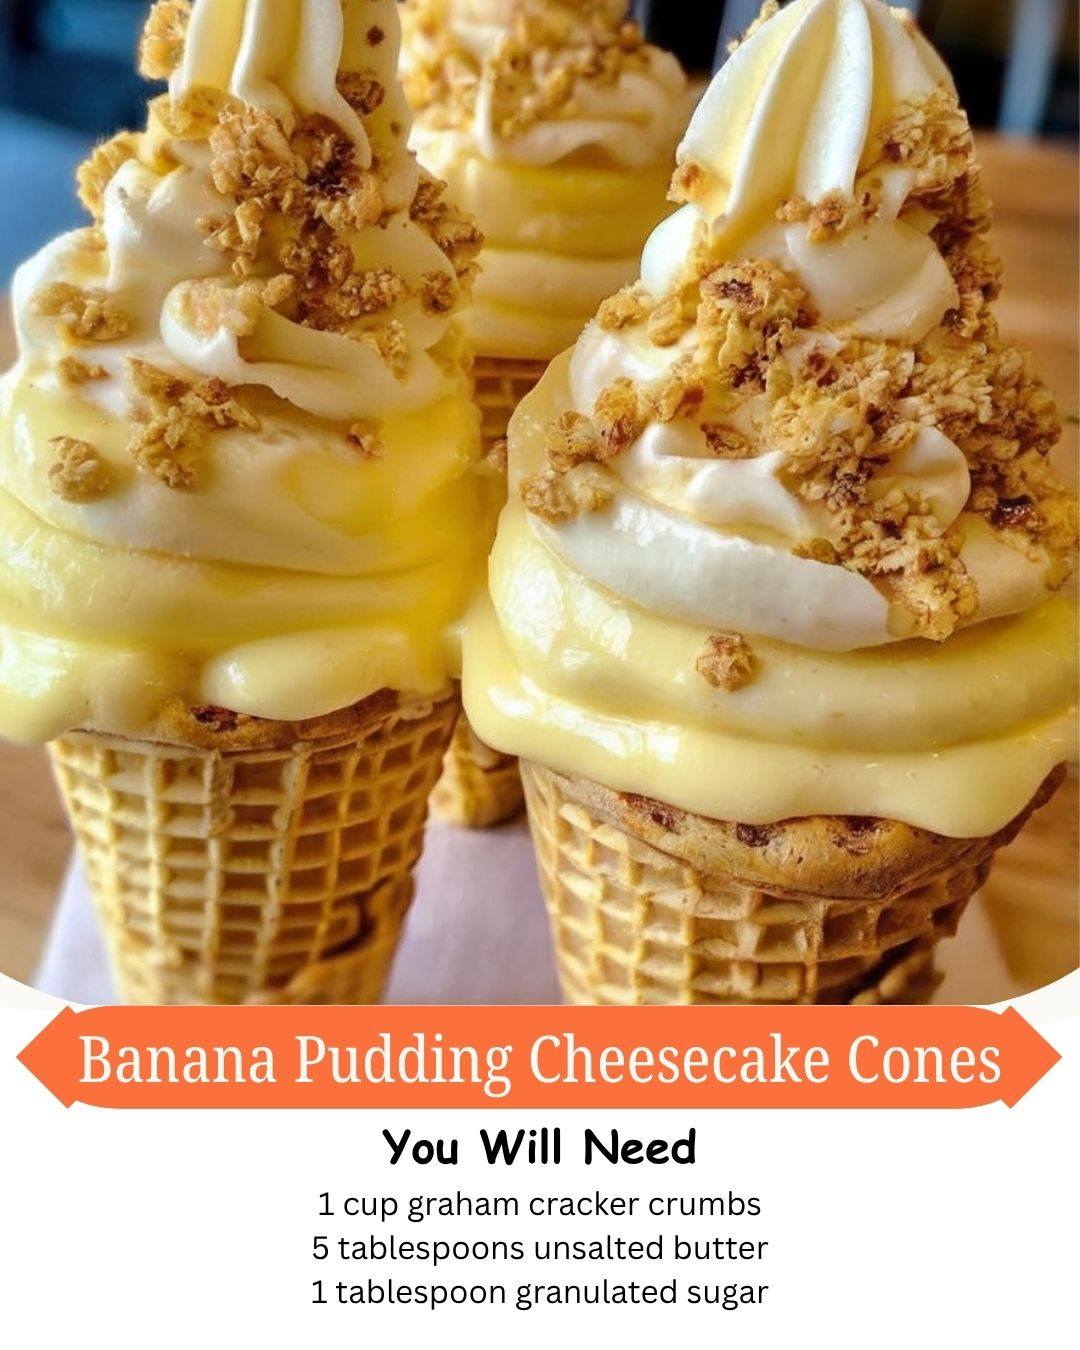
10–12 waffle cones (or sugar cones), fresh and crisp My Homemade Recipe+1
-
Optional: caramel sauce or sweetened condensed milk for drizzling Dessert Hungry+1
-
Additional crushed vanilla wafers / cookie crumbs for topping (optional) My Homemade Recipe+1
Tip: If you’re not serving right away, store the filling in the fridge and assemble cones just before serving to keep cones from getting soggy. Recipes Fiber+1
Instructions — Step by Step
-
Soften & Prep
-
Remove the cream cheese from the fridge about 30 min before starting to let it soften. This ensures a smooth filling. Creatives Cookery+1
-
If using instant banana‑pudding mix: prepare it with cold milk as per package instructions, then chill until slightly thickened. Recipes by Clare+1
-
-
Make the Cheesecake Filling
-
In a large bowl, beat the softened cream cheese until smooth and lump‑free. Add powdered sugar and vanilla, continue mixing until creamy. Recipes by Clare+1
-
In a separate bowl, whip the cold heavy cream until soft peaks form. Gently fold the whipped cream into the cream‑cheese mixture to keep it light and airy. Recipes by Clare+1
-
Fold in the prepared banana pudding mixture until fully incorporated — this gives the cheesecake filling that classic banana‑pudding flavor. Recipes by Clare+1
-
-
Prepare the Cones
-
If you like: crush some vanilla wafers or cookies — you’ll use these for a crunchy crumb layer or topping. My Homemade Recipe+1
-
Optionally, you can lightly dip the rim of each waffle cone in a bit of filling or melted butter and then into the crushed wafer crumbs for a decorative, delicious edge. My Homemade Recipe+1
-
-
Assemble the Cones
-
Use a spoon or a piping bag to fill each waffle cone about halfway with the cheesecake‑banana mixture. Recipes by Clare+1
-
Add a few banana slices (and a sprinkle of crushed wafers if using) — this gives bursts of banana flavor and a nice texture contrast. Recipes by Clare+1
-
Fill the cone the rest of the way with the cheesecake‑pudding mixture. Smooth the top. My Homemade Recipe+1
-
-
Top & Garnish
-
Add a swirl of whipped cream on top.
-
Sprinkle with extra crushed vanilla wafers or cookie crumbs.
-
Optionally, drizzle a bit of caramel sauce or sweetened condensed milk for added richness and a “banana
ADVERTISEMENT
-
