-
8 oz (226 g) cream cheese, softened (brick-style, not the spreadable tub)
-
1/2 cup (113 g) unsalted butter, softened
-
3 cups (360 g) powdered sugar, sifted if lumpy
-
1–2 teaspoons vanilla extract
-
Pinch of salt
-
Optional: 1–2 tbsp heavy cream (to adjust piping consistency)
Decorations (Optional)
-
Holiday sprinkles
-
Sanding sugar
-
Mini pearls
-
Crushed candy canes
-
Mini chocolate chips
Equipment You’ll Need
-
Mini muffin pan (24-count is ideal)
-
Mixing bowl + hand mixer or stand mixer
-
Cookie scoop (helpful but optional)
-
Measuring cups/spoons
-
Tart tamper, a rounded teaspoon, or the back of a small measuring spoon
-
Piping bag + tip (like a 1M star tip) or a zip-top bag
Step-by-Step Instructions
1) Preheat and Prep the Pan
Preheat oven to 350°F (175°C).
Grease a mini muffin pan well (butter or nonstick spray). Even if your pan is nonstick, greasing helps the cups release without cracking.
Tip: If you’re nervous about sticking, dust lightly with flour after greasing, then tap out excess.
2) Cream Butter and Sugar (Important for Texture)
In a large bowl, beat softened butter + sugar for 2–3 minutes until light and fluffy. This step helps create that soft, tender bite.
Butter temperature tip: Softened means you can press it and leave a dent, but it shouldn’t look shiny or melted. If butter is too warm, the dough may spread more.
3) Add Egg and Flavoring
Beat in the egg, then add vanilla and (optional) almond extract. Mix until combined.
Almond extract is subtle but gives that classic sugar cookie flavor you taste in bakery treats.
4) Mix Dry Ingredients
In a separate bowl, whisk together:
-
flour
-
baking powder
-
salt
-
cornstarch
Whisking ensures everything spreads evenly through the dough so cups bake uniformly.
5) Combine Wet + Dry
Add the dry mixture into the wet mixture in two additions. Mix on low speed just until combined.
If the dough looks crumbly and won’t come together, add 1 tablespoon milk and mix again. Add the second tablespoon only if needed.
Your dough should be: soft, thick, and scoopable—not sticky like cake batter, but not dry like pie dough.
6) Portion the Dough
Scoop about 1 tablespoon of dough into each mini muffin cavity.
A small cookie scoop makes this fast and ensures uniform cups.
7) Bake
Bake for 10–12 minutes, until the edges are lightly golden and the centers look set.
Do not overbake. Sugar cookies go from perfect to dry very quickly. Slightly underbaking is better because they finish setting as they cool.
8) Form the “Cup” Shape
This is the fun part.
Right after removing the pan from the oven (while cookies are still soft), press the center of each cookie down to form a well:
-
Use a tart tamper, or
-
the rounded back of a teaspoon / small measuring spoon.
Press firmly but gently. You’re shaping a cup, not smashing it to the bottom.
Tip: If your spoon sticks, lightly grease it or dust it with powdered sugar.
9) Cool Completely
Let cookie cups cool in the pan for 10–15 minutes, then gently twist and lift them out.
Transfer to a wire rack to cool completely before frosting.
Frosting warm cookies = melted frosting and messy swirls.
Cream Cheese Frosting (Dreamy, Pipeable Swirls)
1) Beat Cream Cheese + Butter
Beat the softened cream cheese and butter together for 2 minutes until smooth and creamy.
Make sure both are truly softened so there are no lumps.
2) Add Powdered Sugar Slowly
Add powdered sugar 1 cup at a time, mixing on low speed first so it doesn’t “poof.”
3) Add Vanilla + Salt
Mix in vanilla and a pinch of salt.
If frosting is too thick to pipe smoothly, add 1 tablespoon cream and mix again. Add a second tablespoon only if needed.
Ideal frosting consistency: thick enough to hold a swirl, but smooth enough to pipe without breaking.
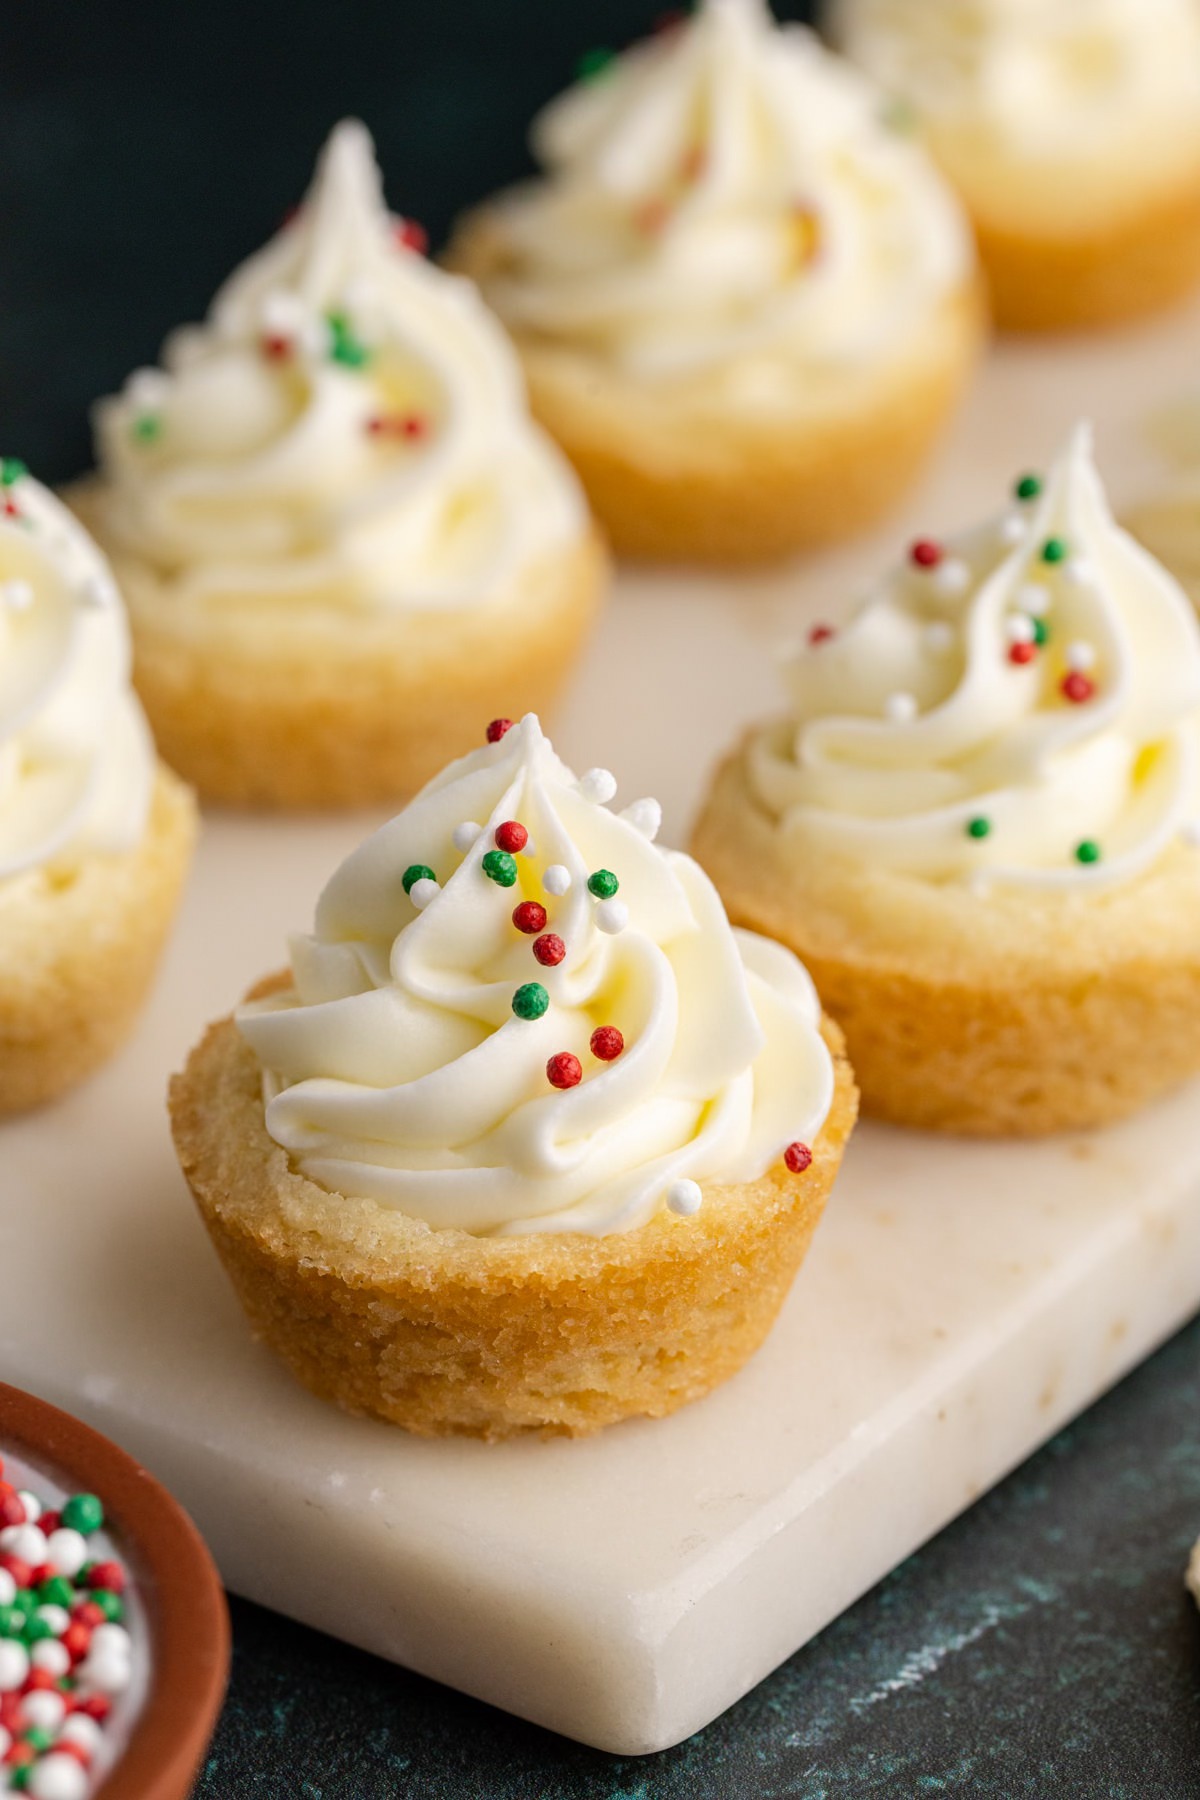
Assemble and Decorate
Pipe or spoon frosting into each cooled cookie cup.
Top with sprinkles immediately so they stick.
Pro decorating tip: Use a 1M star tip for that bakery swirl look.
How to Keep Them Soft and Perfect
Don’t overbake
Remove when edges are just starting to turn golden. The center should look set, not browned.
Use cornstarch
Cornstarch gives softness and prevents a dry crumb.
Don’t overmix after adding flour
Overmixing creates tougher cookies.
Cool before removing
Removing too soon can cause cracking.
Fun Variations (Make This Recipe Your Own)
1) Jam-Filled Sugar Cookie Cups
Add 1/2 teaspoon jam (raspberry, strawberry, apricot) into each cup before frosting, or skip frosting and just dust with powdered sugar.
2) Lemon Sugar Cookie Cups
Add zest of 1 lemon to the dough and a splash of lemon juice to the frosting for a bright holiday twist.
3) Chocolate-Dipped Cups
Dip the rim of each cookie cup in melted chocolate and let set before frosting.
4) Sprinkle Confetti Cups
Fold 1/3 cup sprinkles into the dough for a funfetti look.
5) Peppermint Holiday Version
Top frosting with crushed candy canes or a tiny peppermint candy piece.
Storage + Make-Ahead Tips
Unfrosted cookie cups
Store airtight at room temperature 3–4 days, or freeze up to 2 months.
Frosted cookie cups
Because of cream cheese frosting:
-
Store in the refrigerator in a covered container up to 4–5 days.
-
Let sit at room temperature 10–15 minutes before serving for best texture.
Make-ahead plan
Bake cups 1–2 days ahead, store airtight. Frost the day of serving for the freshest presentation.
Conclusion
These Sugar Cookie Cups with Cream Cheese Frosting are the kind of treat that disappears faster than you can set them out—and for good reason. They’re buttery and soft, perfectly chewy in the center, shaped into adorable little cups, and finished with a silky cream cheese frosting swirl that tastes like pure holiday comfort. Whether you’re making dessert for a party, filling a cookie box, or setting up a decorating station with kids, this recipe checks every box: easy, festive, and guaranteed to impress.