In a medium bowl, whisk together:
-
flour
-
cocoa powder
-
baking powder
-
baking soda
-
salt
This step ensures even distribution of the cocoa, which prevents dry pockets and gives your cookies the proper rise and texture.
Step 2: Cream the Butter and Sugar
In a large mixing bowl, use a hand mixer or stand mixer to beat:
-
1 cup softened butter
-
1 ½ cups sugar
Mix for 2–3 minutes, until the mixture becomes pale, fluffy, and creamy.
This is crucial for creating a soft, tender crumb.
Step 3: Add the Eggs and Vanilla
Beat in:
-
2 large eggs
-
2 teaspoons vanilla extract
Mix well until fully incorporated. The dough will become glossy and smooth.
Step 4: Add the Milk
Pour in the milk and mix briefly. The batter will look loose, but it will tighten up once the dry ingredients are added.
Step 5: Combine Wet and Dry Mixtures
Slowly add the dry ingredients into the wet mixture. Mix on low speed until fully combined and no streaks remain.
Do not overmix—this keeps the cookies soft and chewy.
Step 6: Add Chocolate or Nuts (Optional)
Fold in:
-
white chocolate
-
nuts
or both.
They add great flavor contrast and extra texture.
Step 7: Chill the Dough
Cover and refrigerate the dough for 30 minutes to 1 hour.
Chilling:
-
prevents spreading
-
enhances flavor
-
makes scooping much easier
Don’t skip this step!
Step 8: Shape the Cookies
Preheat your oven to 350°F (175°C).
Scoop dough using a cookie scoop or tablespoon, forming balls about 1.5 tablespoons each.
Place them on a baking sheet lined with parchment or a silicone mat.
Step 9: Bake the Cookies
Bake for 10–12 minutes.
You’ll know they’re done when:
-
the tops crack beautifully
-
the edges are set
-
the centers still look soft
Cookies continue baking on the sheet for 2 minutes after removal.
Step 10: Make the Glaze
Whisk together:
-
powdered sugar
-
milk
-
vanilla extract
The glaze should be fluid but thick enough to cling lightly.
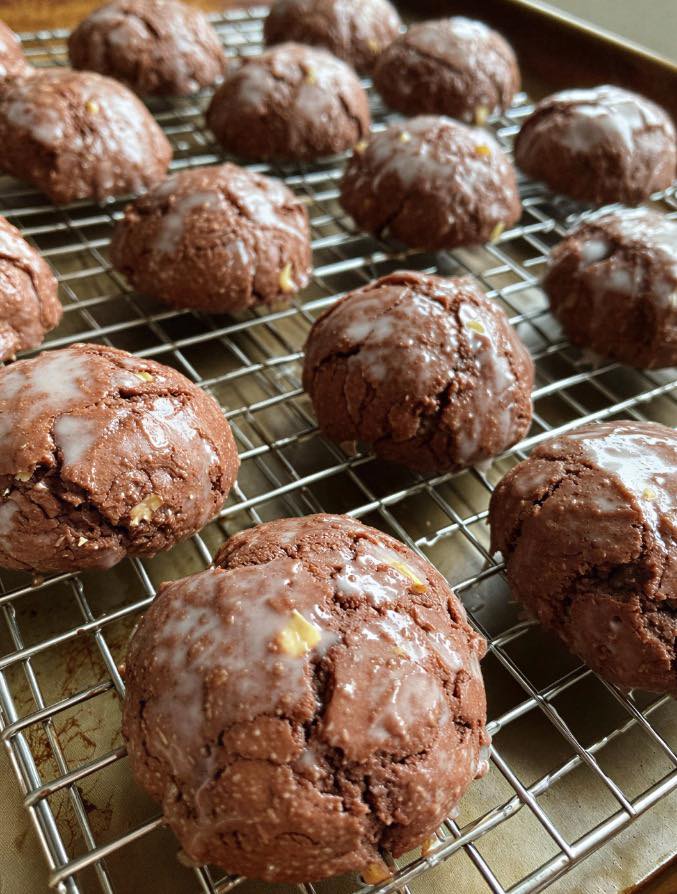
Step 11: Glaze the Cookies
While cookies are still warm, drizzle glaze over the tops.
The heat helps it set into that beautiful glossy finish.
Place on a wire rack to cool completely.
🍽 Serving Suggestions
These cookies pair perfectly with:
-
cold milk
-
hot coffee
-
vanilla ice cream
-
hot chocolate
-
caramel latte
-
holiday dessert boards
They also make excellent edible gifts wrapped in cellophane bags or cookie boxes.
💡 Expert Tips for Perfect Chocolate Glazed Crinkle Cookies
✔ Chill the Dough
Prevents flat, spread-out cookies.
✔ Don’t Overbake
Soft centers = fudgy perfection.
✔ Use High-Quality Cocoa
Better cocoa means richer flavor.
✔ Add Mix-Ins for Texture
White chocolate contrasts beautifully with the cocoa.
✔ Let Glaze Set
Allows cookies to stack without sticking.
🔄 Recipe Variations
1. Double Chocolate Crinkle Cookies
Add 1 cup chocolate chips to the dough.
2. Peppermint Chocolate Cookies
Add crushed peppermints into the dough for a holiday touch.
3. Mexican Hot Chocolate Version
Add a pinch of cinnamon + cayenne pepper.
4. Nutella-Filled Crinkle Cookies
Freeze small balls of Nutella and stuff inside dough before baking.
5. Coffee Chocolate Cookies
Dissolve 1 teaspoon espresso powder into the milk.
🧊 Storage & Freezing Instructions
Room Temperature:
Store in an airtight container for up to 5 days.
Refrigerator:
Keeps for 1 week.
Freezer Cookies (Baked):
Freeze up to 3 months in a sealed container.
Freezer Dough:
Portion into balls and freeze raw.
Bake from frozen, adding 2 minutes.
❓ Frequently Asked Questions (FAQ)
1. Why did my cookies spread too much?
Your dough was too warm—chill longer next time.
2. Why aren’t my cookies cracking on top?
Ensure your oven is fully preheated.
Cracks form from heat shock.
3. Can I make the dough ahead?
Yes! Chill up to 48 hours.
4. Can I use Dutch-processed cocoa?
Yes, but reduce baking soda slightly.
5. Why is my glaze too runny?
Add more powdered sugar until it thickens.
Conclusion: The Perfect Cookie for Every Chocolate Lover
These Chocolate Glazed Crinkle Cookies deliver everything you want in a homemade treat—soft centers, rich chocolate flavor, crackly tops, and a touch of sweetness from the glaze. They’re easy enough for weeknight baking yet impressive enough for holidays and parties. Once you try them, they’ll become a go-to recipe in your kitchen.
Whether you’re a seasoned baker or just beginning your baking journey, this recipe is guaranteed to bring smiles, comfort, and chocolate joy to everyone who tastes them.