🍽 Equipment
-
Mixing bowl
-
Hand mixer or stand mixer
-
Small cookie scoop (1 tbsp size)
-
Baking sheet
-
Parchment paper
-
Heat-proof bowl for melting chocolate
-
Fork or dipping tool
👩🍳 Step-by-Step Instructions
Step 1 — Make the Peanut Butter Filling
In a large mixing bowl, combine the softened butter and creamy peanut butter. Beat using a hand mixer until fully blended, creamy, and smooth. Add the vanilla extract and continue mixing.
Gradually sift in the powdered sugar—about ½ cup at a time—mixing on low after each addition. As the sugar incorporates, the mixture will become thicker and form a soft dough.
Stop mixing when the dough is smooth, cohesive, and no longer sticky. If it still feels sticky, add 2–4 tablespoons more powdered sugar.
Step 2 — Shape the Truffles
Line a baking sheet with parchment paper.
Using a small cookie scoop or a tablespoon, portion the peanut butter dough into evenly sized balls. Roll each portion between your palms until smooth and round.
Place the shaped balls on the prepared baking sheet, making sure they do not touch.
Freeze or refrigerate for 20 minutes—just long enough for them to firm up and hold their shape during dipping.
Step 3 — Melt the Chocolate
Place the chocolate chips (or chopped chocolate) in a heat-proof bowl. Add the coconut oil.
Melt the chocolate using one of the following methods:
Microwave Method (Fastest):
Microwave for 20–30 seconds at a time, stirring between each interval, until smooth and glossy.
Double Boiler Method:
Place the bowl of chocolate over a pot of gently simmering water (do not let the bowl touch the water). Stir continuously until fully melted.
Be careful not to overheat the chocolate; overheating can cause thickening or seizing.
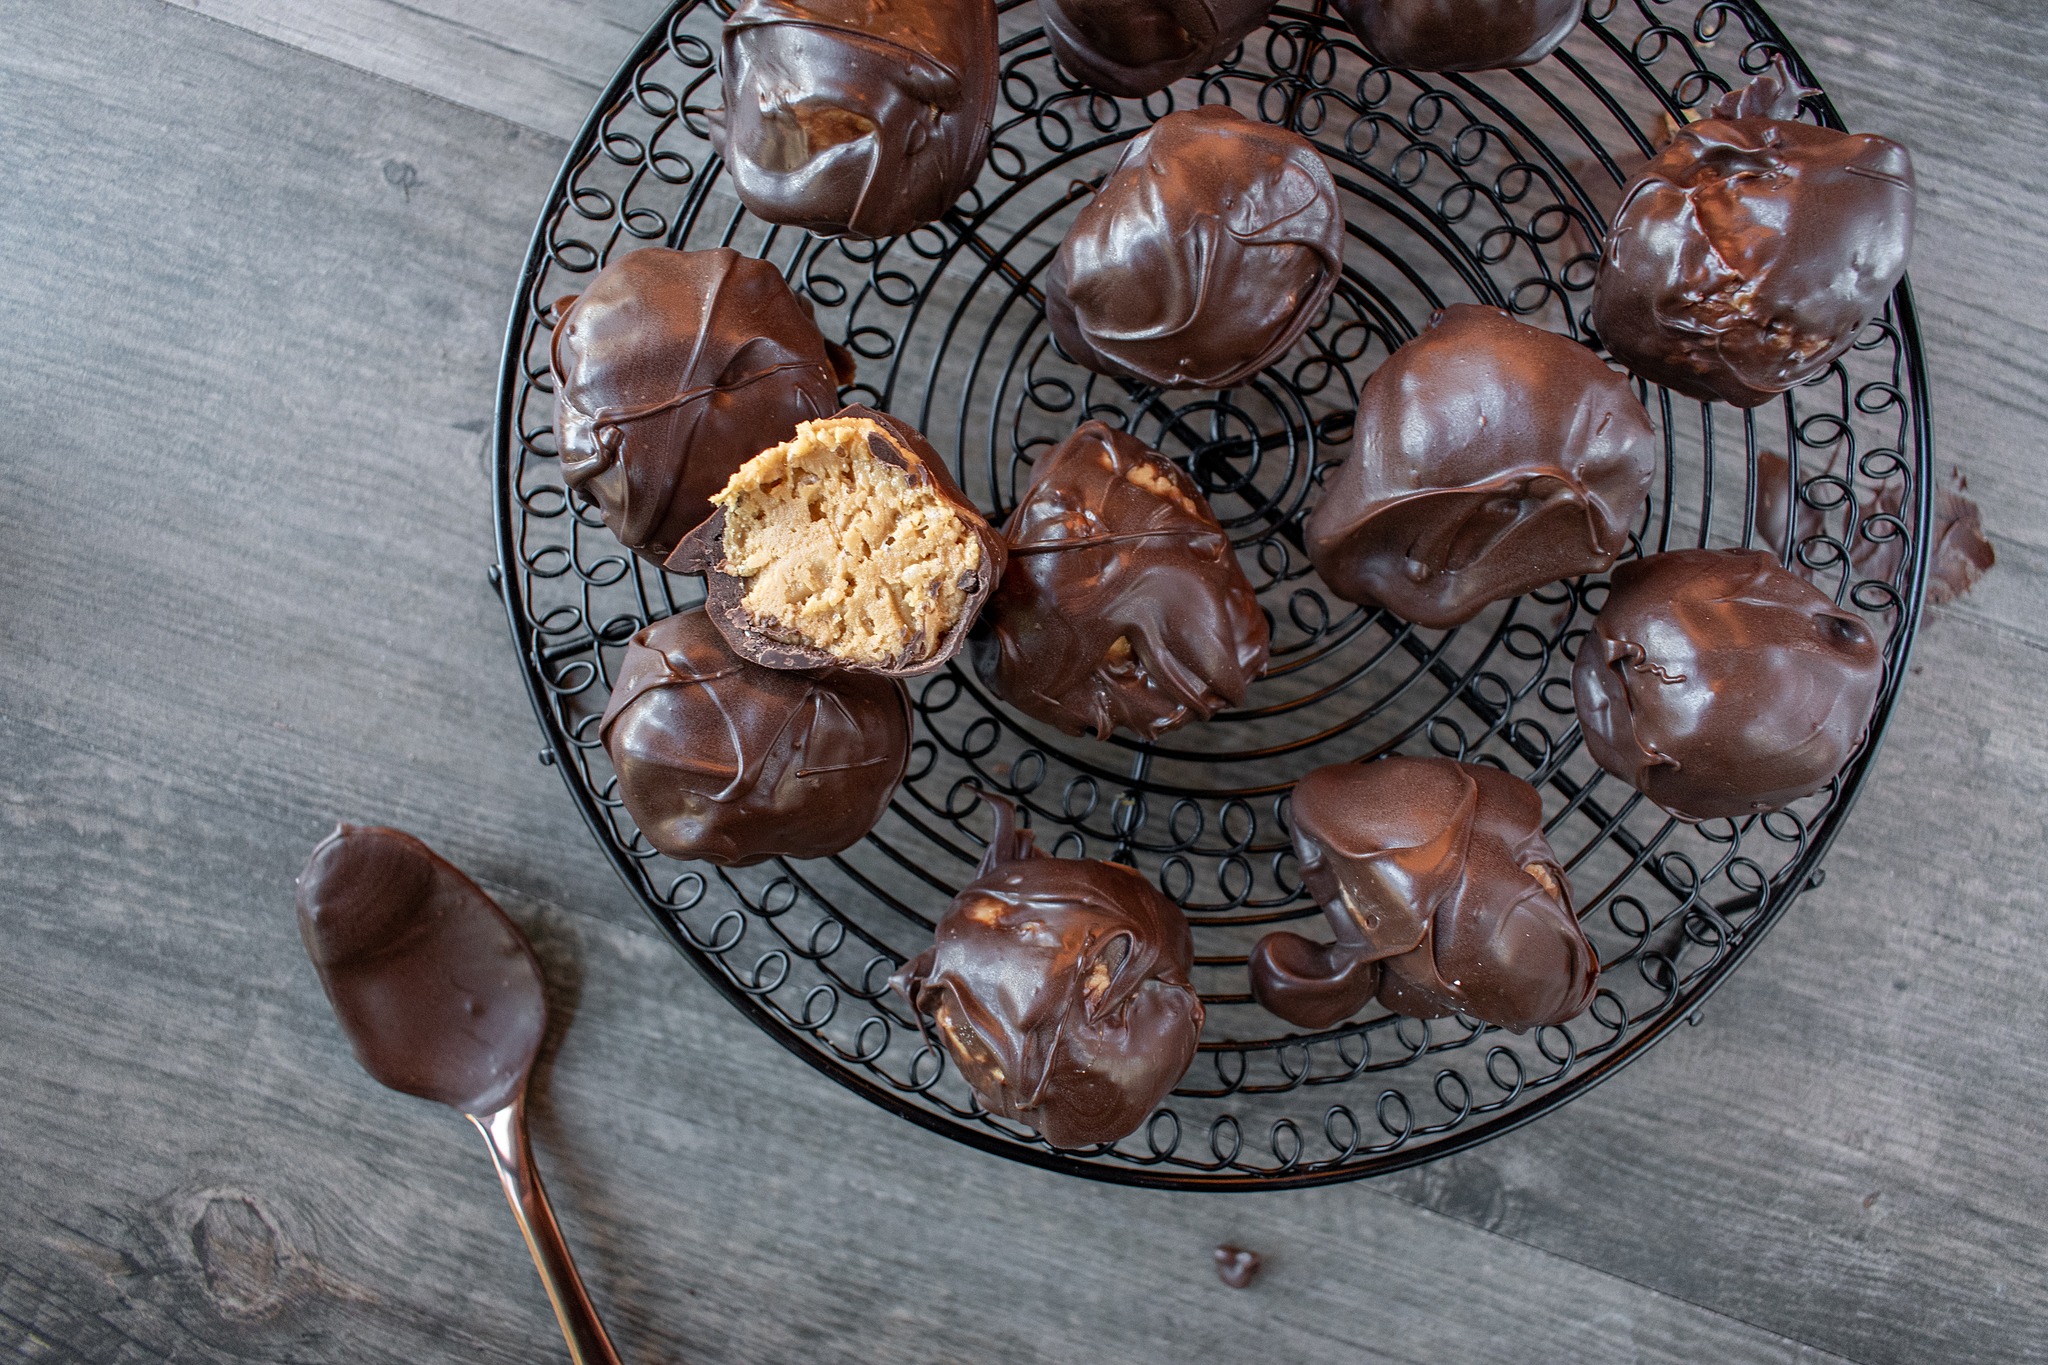
Step 4 — Dip the Truffles
Remove the chilled peanut butter balls from the fridge or freezer.
Using a fork or dipping tool, lower each ball into the melted chocolate, fully coating it. Gently tap the fork on the edge of the bowl to remove excess chocolate, then slide the coated truffle back onto the parchment-lined baking sheet.
Repeat until all truffles are dipped.
If desired, drizzle extra chocolate zig-zags on top for decoration or sprinkle crushed peanuts before the coating sets.
Step 5 — Let the Chocolate Set
Allow the truffles to rest at room temperature for 20–30 minutes, or refrigerate until the chocolate hardens.
Once set, transfer them to an airtight container. Layer with parchment paper to prevent sticking.
🍫 Flavor Variations
1. White Chocolate Peanut Butter Truffles
Dip in white chocolate or swirl dark and white chocolate together.
2. Crunchy Peanut Butter Version
Use crunchy peanut butter or fold crushed peanuts into the dough.
3. Chocolate-Peanut Butter “Buckeyes”
Only dip the truffles partially, leaving a circle of peanut butter exposed—traditional to Ohio.
4. Salted Dark Chocolate Truffles
Finish each with a tiny pinch of flaky sea salt.
5. Holiday Truffles
Use colored chocolate melts or festive sprinkles before the coating sets.
🧊 Storage & Freezer Tips
Refrigerator:
Store in an airtight container for up to 3 weeks.
Freezer:
Freeze in layers (with parchment between them) for up to 3 months.
Thaw in the refrigerator before serving.
Room Temperature:
Fine for 2–3 days in a cool environment, but chocolate may soften.
❗ Troubleshooting Guide
The filling is too sticky.
Add more powdered sugar, 1 tablespoon at a time.
The filling cracks when rolling.
You added too much powdered sugar. Add 1–2 tablespoons softened butter and mix again.
The chocolate coating looks dull.
Add coconut oil when melting or melt the chocolate more gently.
The truffles flatten after dipping.
They were not chilled long enough. Freeze for 10 more minutes before dipping.
⭐ Expert Tips for Perfect Truffles Every Time
✔ Use a quality peanut butter
Avoid natural peanut butter that separates; it results in oily or crumbly dough.
✔ Chill before dipping
This keeps the truffles round and helps the chocolate cling smoothly.
✔ Work in small batches
If the peanut butter balls warm up, they may fall apart during dipping.
✔ Don’t overheat the chocolate
Warm chocolate flows smoothly and coats beautifully.
✔ Add texture if you like
Graham crumbs, pretzel bits, or crispy rice cereal make fun variations.
🍬 Serving Ideas
-
Arrange on a holiday dessert platter
-
Box them as edible gifts
-
Add to Christmas cookie trays
-
Serve next to coffee, hot chocolate, or espresso
-
Crush a few and sprinkle over vanilla ice cream
Their rich, creamy texture makes them a dessert that pairs well with almost anything.
❓ Frequently Asked Questions
Can I use almond butter or another nut butter?
Yes—but choose a no-stir variety. Natural nut butters are too oily for this recipe.
Can I make these dairy-free?
Use vegan butter and dairy-free chocolate. The recipe works perfectly.
Can I use milk chocolate instead of dark?
Yes! Milk chocolate gives a sweeter, softer shell.
Why add coconut oil?
It thins the chocolate and gives a shiny, smooth finish.
🍯 Full Printable Recipe
Chocolate-Covered Peanut Butter Truffles
Ingredients
-
1 ½ cups creamy peanut butter
-
½ cup unsalted butter, softened
-
1 tsp vanilla extract
-
3 cups powdered sugar
-
2 cups semi-sweet chocolate chips
-
1 tbsp coconut oil (optional)
Instructions
-
Beat the peanut butter and butter together until smooth. Add vanilla.
-
Slowly mix in the powdered sugar until a soft dough forms.
-
Roll dough into balls and place on a parchment-lined tray. Chill 20 minutes.
-
Melt chocolate and coconut oil until smooth.
-
Dip chilled balls into the chocolate, coating fully.
-
Set onto parchment and allow chocolate to harden.
-
Store in an airtight container at room temp, fridge, or freezer.
❤️ Final Thoughts
These chocolate-covered peanut butter truffles are proof that the most delightful desserts don’t need to be complicated. With their silky peanut butter centers and rich chocolate shells, they taste like gourmet confections—but require only minutes of work.
Make them for celebrations, holidays, gifts, or late-night cravings. They never disappoint, and they’re guaranteed to become one of your go-to homemade treats.