Line a baking sheet with parchment paper or wax paper.
Using a cookie scoop or tablespoon, portion out about 1½‑tablespoons (or size of a golf ball) of the mixture and roll into smooth balls. Place each on the prepared sheet.
Freeze or refrigerate for about 30 minutes to firm up. To Simply Inspire+1
3. Melt the Chocolate & Coat
In a microwave‑safe bowl (or double boiler), melt the chocolate bark or chips. If using a microwave, heat in 30‑second intervals at 50% power, stirring between each until it’s just melted and smooth. Be careful not to over‑heat. To Simply Inspire
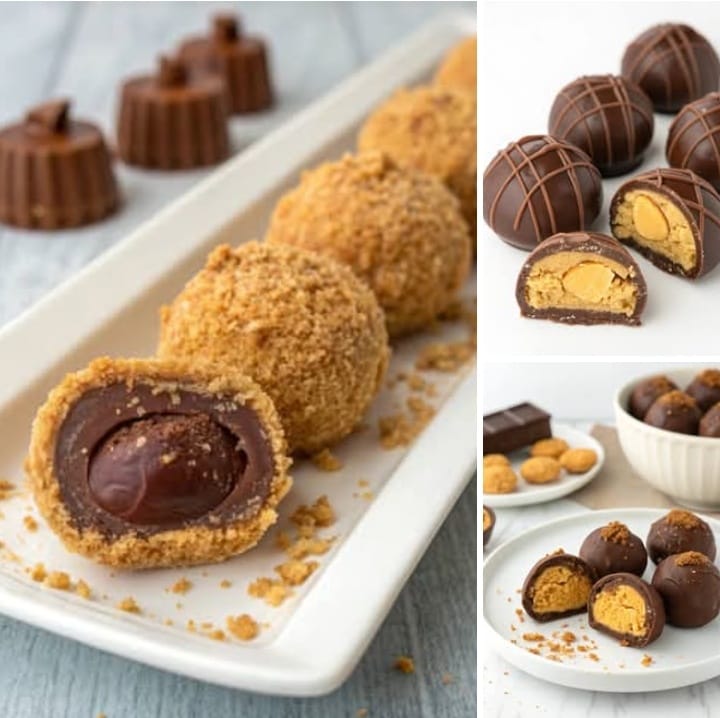
Using a toothpick, fork or dipping tool, dip each chilled ball into the melted chocolate to coat completely (or leave a small exposed top for a “buckeye” look). Think: full or partial coating.
Allow excess chocolate to drip off, then place back on the parchment lined sheet. Immediately sprinkle the top with extra crushed Butterfinger, sea salt or holiday sprinkles while chocolate is still wet.
4. Set & Serve
Let the coated balls sit at room temperature or in the fridge until the chocolate is fully set.
Serve at room temperature for best texture. Store leftover balls in an airtight container in the refrigerator. No Dash of Gluten+1
Tips for Success
-
Use regular creamy peanut butter, not a natural peanut butter with separated oil, which may affect texture and setting. Desserts On A Dime+1
-
Chill the balls before dipping—they’ll hold shape better and reduce risk of melting during coating. Princess Pinky Girl
-
If your chocolate is too thick or seizes, stir in a tiny bit (¼‑½ tsp) of vegetable oil or coconut oil to loosen it.
-
Use graham cracker crumbs for a slight biscuit crunch and structure; you can substitute with crushed wafer cookies if desired.
-
For a glossy finish, melt chocolate bark or use properly tempered chocolate. Avoid any water contact during melting. To Simply Inspire
Variations
-
Gluten‑free version: Use gluten‑free graham cracker crumbs or substitute with gluten‑free cookie crumbs. No Dash of Gluten
-
Nut‑free alternative: If peanut allergy, substitute peanut butter with a safe alternative such as sunflower seed butter, and ensure all ingredients are allergy‑safe.
-
Flavor twists: Stir in a pinch of sea salt into the filling, or use dark chocolate, white chocolate, or even colored candy melts for coating.
-
Mini size: Roll into smaller 1‑tablespoon balls for bite‑sized treats; adjust count accordingly.
-
Other candy variations: Instead of Butterfinger, you can crush other candy bars (e.g., Heath, Twix) to mix into the filling. sugarandsoul.co
Ingredient Substitutions
-
Peanut butter → almond butter or cashew butter (note: texture may vary, may require extra crumbs/powdered sugar)
-
Butter → margarine is not recommended—use real butter for best texture. To Simply Inspire
-
Chocolate bark/coating → substitute with good‑quality chocolate chips; if pure chocolate chips, you may need to temper or add oil to get smooth coating.
-
Graham cracker crumbs → substitute with crushed digestive biscuits, vanilla wafers, or gluten‑free wafers.
-
Butterfinger candy bars → you can purchase Butterfinger baking bits or crush full‑size bars yourself.
Storage & Freezing
-
Refrigerator: Store in an airtight container, with parchment or wax paper between layers, for up to 2 weeks. No Dash of Gluten
-
Freezer: These freeze well—place in freezer‑safe container or bag, separate layers with parchment. Freeze up to 3‑6 months. Thaw in fridge or at room temp before serving. Desserts On A Dime
-
Serving note: If chilled, let sit 10 minutes at room temperature before serving so the center softens slightly for best bite.
What to Serve With These Butterfinger Balls
-
A glass of cold milk or chilled coffee — the richness of the peanut butter and chocolate pairs beautifully with a creamy drink.
-
Include them on a dessert platter alongside fudge, truffles, and other no‑bake bits for a party spread.
-
Use as edible gifts — place a few in a decorative cellophane bag, tie with ribbon, and you’ve got a homemade candy gift.
-
For a fun twist, crumble the balls over vanilla ice cream or use as a topping for cupcakes.
Nutrition Facts (Approximate per ball)
Calories: ~220‑230 kcal
Carbohydrates: ~20‑25 g
Protein: ~3‑4 g
Fat: ~13‑15 g
Note: values vary depending on exact size and ingredients. To Simply Inspire
FAQs
Q: Do I need to bake these?
No—this is a no‑bake recipe. The mixture firms up in the fridge/freezer, then gets coated in melted chocolate. To Simply Inspire+1
Q: Why did my balls fall apart when dipping?
Likely cause: not chilled enough before coating, or peanut butter mixture too soft. Chill longer, ensure mixture is firm enough to roll. Also ensure chocolate isn’t too hot when dipping.
Q: Can I use natural peanut butter?
It’s not recommended—natural peanut butter tends to separate oil, which can lead to a greasy or soft texture that won’t set well. Desserts On A Dime
Q: Can I make these ahead for a party?
Absolutely. You can make, chill and coat ahead of time. Store in fridge until guests arrive; they’ll still be firm and delicious. They also make great gifts if kept cool.
Related Recipes
-
[Butterfinger Pie or Butterfinger Cupcakes – using the same candy bar in dessert form] (#)
Conclusion
If you’re looking for a treat that’s quick, crowd‑pleasing and deliciously indulgent, these Butterfinger Balls are it. With just a handful of ingredients and minimal fuss, you’ll end up with crunchy, chocolate‑covered bites that taste like candy bar dreams in a ball. Make a batch, share them, and watch how fast they disappear.