- Whisk melted butter and sugar until glossy.
- Add eggs and vanilla. Whisk until smooth.
- Stir in cocoa powder, flour, and salt until just combined (don’t overmix).
- Fold in chocolate chips if using.
3) Bake
- Spoon batter into muffin cups, filling each about 2/3 full.
- Bake 12–16 minutes, until edges look set but centers are still soft.
4) Shape into cups
- While brownies are still hot (and very soft), press the center of each brownie down using the bottom of a small glass,
a spoon, or a tart tamper to create a “cup.” - Let cool in the pan 10 minutes, then transfer to a rack to cool completely.
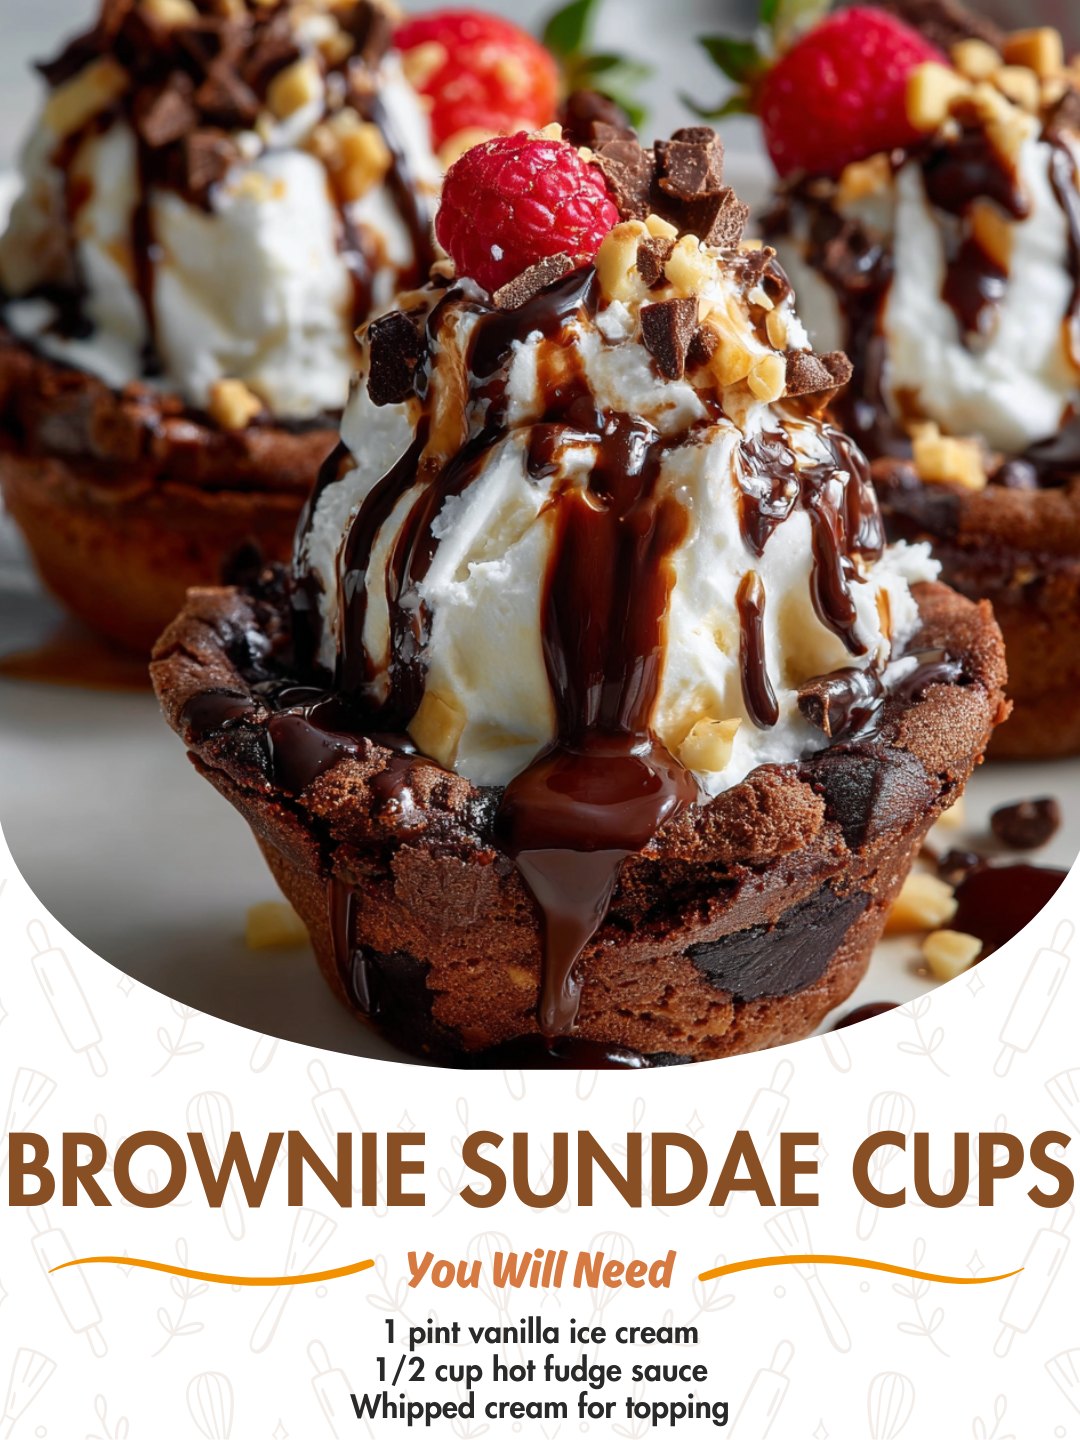
5) Assemble the sundaes
- Add a scoop of ice cream into each brownie cup.
- Drizzle with hot fudge or chocolate syrup.
- Top with whipped cream and your favorite toppings.
- Serve immediately for best texture.
Serving and Storage:
Brownie sundae cups are best assembled right before serving so the ice cream stays firm and the brownie stays chewy (not
soggy). For parties, bake the brownie cups ahead and set up toppings so guests can build their own.
- Brownie cups: Store airtight at room temperature up to 3 days.
- Refrigerate: Up to 5 days (warm slightly before serving for softer texture).
- Freeze cups: Freeze plain brownie cups up to 2 months. Thaw at room temperature.
- Assembled cups: Not ideal for long storage—ice cream melts and refreezes with icy texture.
Tips:
- Press while warm: The cup shape forms best when the brownies are hot and soft.
- Don’t overbake: Slightly underbaked brownies stay fudgy and make the best cups.
- Grease well: Muffin tins vary—greasing prevents sticking and broken cups.
- Cleaner scoop: Dip your ice cream scoop in warm water for smooth, round scoops.
- Hot + cold magic: Warm brownie cups (10 seconds in microwave) + cold ice cream tastes amazing.
Variations:
- Peanut butter cup: Add a spoon of peanut butter in the center before pressing the cup shape.
- Mint brownie sundae: Use mint chocolate chip ice cream and top with crushed chocolate cookies.
- S’mores style: Add marshmallow fluff and graham cracker crumbs, then torch lightly.
- Salted caramel: Drizzle caramel sauce and sprinkle flaky salt on top.
- Double chocolate: Use chocolate ice cream and add extra chocolate chips.
Tips:
- Party shortcut: Use boxed brownie mix to save time—still press into cups while warm.
- Make it neat: Chill brownie cups 15 minutes before filling so ice cream doesn’t melt as quickly.
- Extra crunch: Sprinkle chopped nuts or cookie crumbs inside the cup before adding ice cream.
- Holiday twist: Add crushed peppermint candies on top for a festive look.
Conclusion:
Brownie Sundae Cups are the kind of dessert that makes everyone smile. They’re fudgy, fun, and customizable, with the
perfect balance of warm brownie and cold ice cream. Whether you serve them for a birthday party, holiday gathering, or a
simple weekend treat, these little cups deliver big sundae energy—no ice cream parlor required.
FAQ:
Can I use a brownie mix?
Yes. Use your favorite boxed mix and bake in a greased muffin tin. Press the centers while warm to form cups.
How do I keep the brownie cups from sticking?
Grease the muffin tin generously (even if it’s nonstick) and let cups cool slightly before removing.
What ice cream flavor works best?
Vanilla is classic, but chocolate, strawberry, coffee, salted caramel, mint, or cookies-and-cream are all amazing.
Can I make them ahead for a party?
Absolutely. Bake the brownie cups 1–2 days ahead and store airtight. Assemble with ice cream right before serving.
How do I make them extra fudgy?
Slightly underbake and add chocolate chips. You can also warm the cups briefly before filling.